Infor Visual - Label Printing Part 2 - NiceLabel
Step 1 - Nicelabel Install
Download Nicelabel, install the full suite including Control Center. It’s pretty straight forward and you can just keep clicking next for everything. The only customization is the DB server and the IIS settings. You can use your Visual DB server, and I’d generally recommend doing so. I recommend using a dedicated Windows service account for NiceLabel.
Nicelabel’s KB for install is : https://help.nicelabel.com/hc/en-001/categories/4405140034833-NiceLabel-Installation
IIS may be a bit complicated. You want to install Nicelabel on your Visual server.
Spend some time reviewing the Control Panel. By default it is http://visual-server/EPM/ , assuming installed on the visual server.
You will also need to enter the licensing through the Control Panel (Administration -> Product Info). Nicelabel sales folks don’t tend to know what product you will need for Visual 10. It is “LMS Pro”, minimum number of printers is 5.
It is recommended to turn on AD authentication (Administration -> Authentication).
Generally you don’t need any Global Variables. You can set up email alerts, but I typically don’t.
For Archiving (Administration -> Achiving, you can leave with default settings.
For users (user tab), have at least one Application User that has admin rights, and set Windows AD users for normal access. You’ll need admins, of course. But if you want persons to print through Nicelabel rather than printing through Visual, you’ll need to add them here.
Step 2 - Shares
I’d recommend creating a new folder on your Visual server’s Visual shared folder.
So as an example,
If your Visual is installed to
\visual-server\visual1000$\VMFG
I’d create a new folder with:
\visual-server\visual1000$\Labels
Set the appropriate NTFS permissions. Your Nicelabel service account will need Modify permission so it can delete PAS files after printing them.
Step 3 - Automation
Get a copy of GETLABEL.MISX from Nicelabel Support or Infor support. Put in above shared folder.
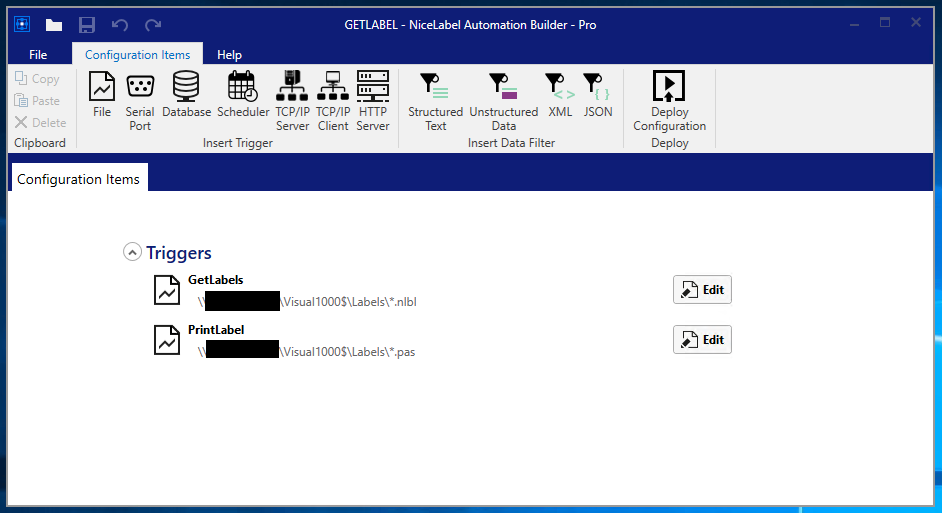
Open the file with NiceLabel Automation Builder. You should see two Triggers, GetLabel and PrintLabel.
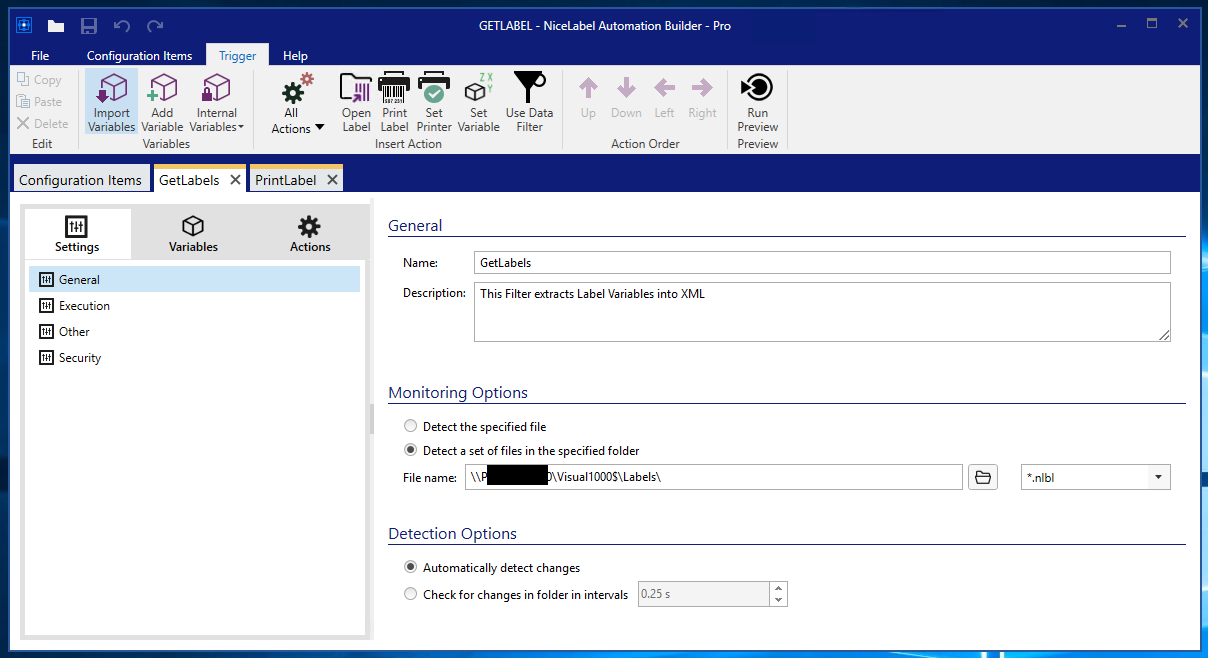
Click the Edit button beside each. For GetLabels, put the Label folder in the textbook next to “File Name:” and set the format to NLBL.
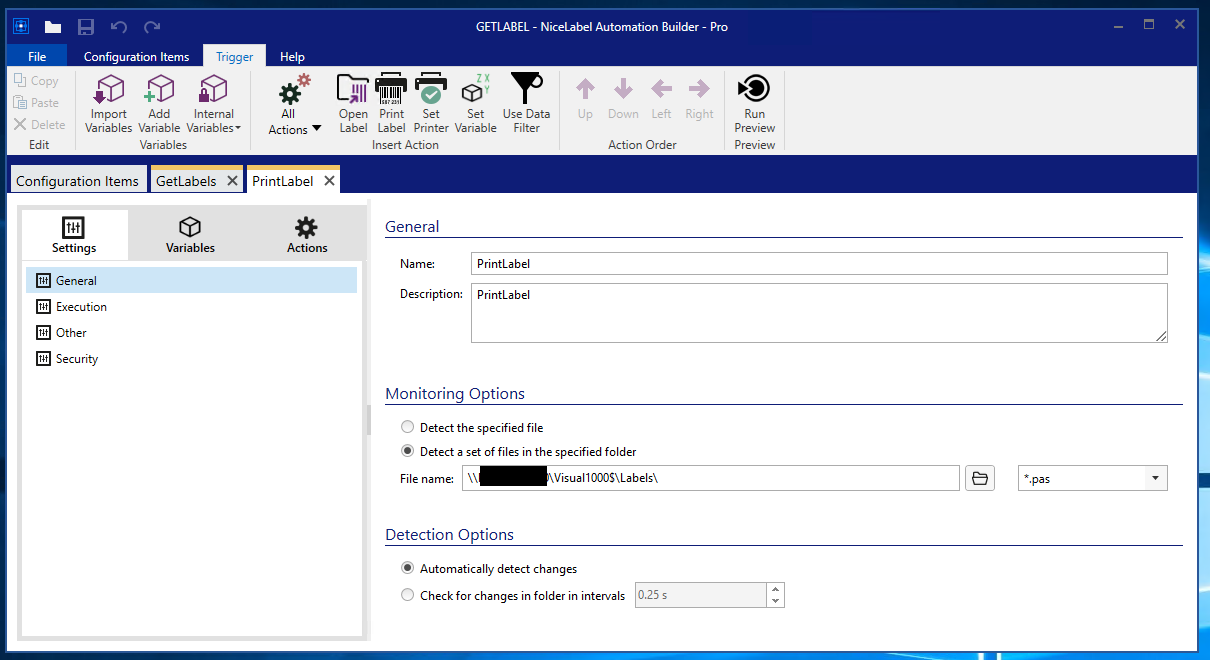
Repeat for PrintLabel but select PAS as the format.
Be sure to save the changes under File -> Save.
Step 4 - Add Printers
Setup your label printers as normal Windows printers on the server with NiceLabel installed.
Step 5 - Visual Configuration
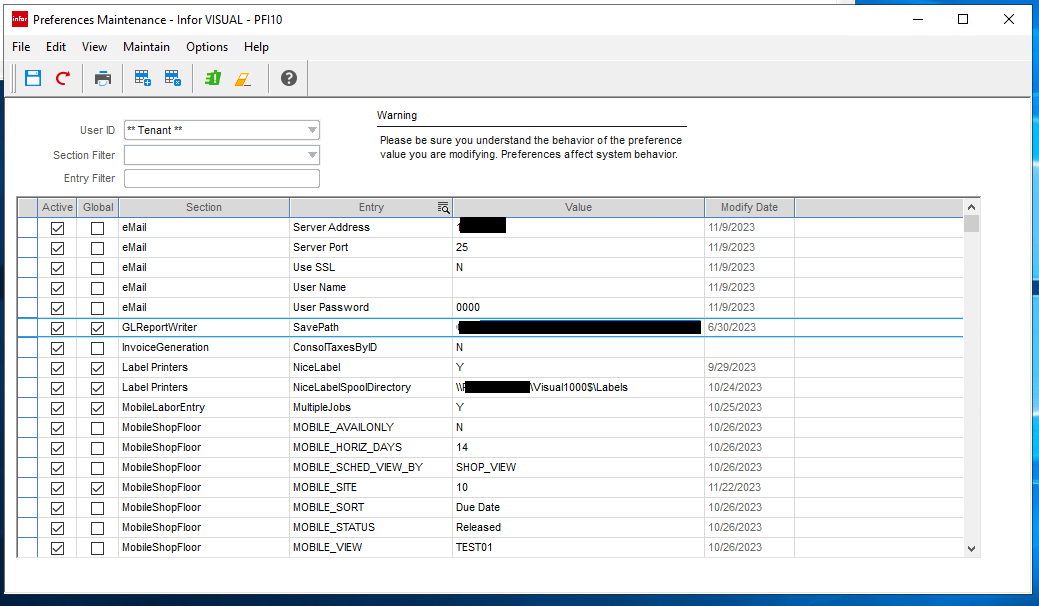
Open Visual, log in as SYSADM. Go to Admin -> Preferences Maintenance. Switch “User ID” field to Tenant (second entry from top), specifically NOT All (first entry at top).
Click the Insert Row button (square with blue strip and plus sign, middle of icons)
To select Nicelabel (vs Loftware): Insert row. For section put in “Label Printers”, for Entry put in “NiceLabel”, and for Value put in “Y”. All with no quotes. To select your label folder: Insert another row. For section put in “Label Printers”, for Entry put in “NiceLabelSpoolDirectory”, for value put in the UNC path for your label folder.
Hit the save button. Close Preferences Maintenance.
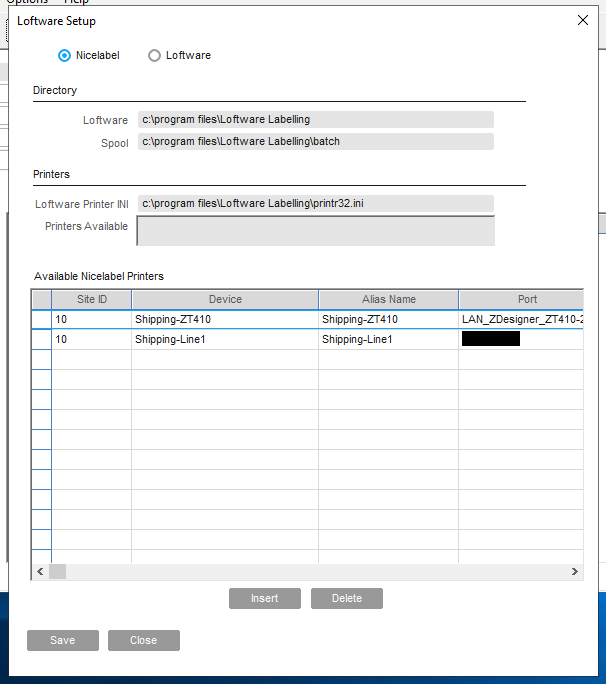
Go to Admin on Visual task bar -> Label Printer Setup Utility -> Maintain -> Loftware setup
Select Nicelabel. Make sure the paths are correct. This is why I recommend installing Nicelabel on the Visual server.
Click the Insert button to add your printers. You’ll note it’s the list of Windows printers on the Visual server. I leave the device name and alias name the same. Remember to click Save. Close Loftware Setup.
Setup is complete.
Step 6 - Label Definitions
Now you need to create a few labels using Nicelabel Designer 10 and put them in your label folder.
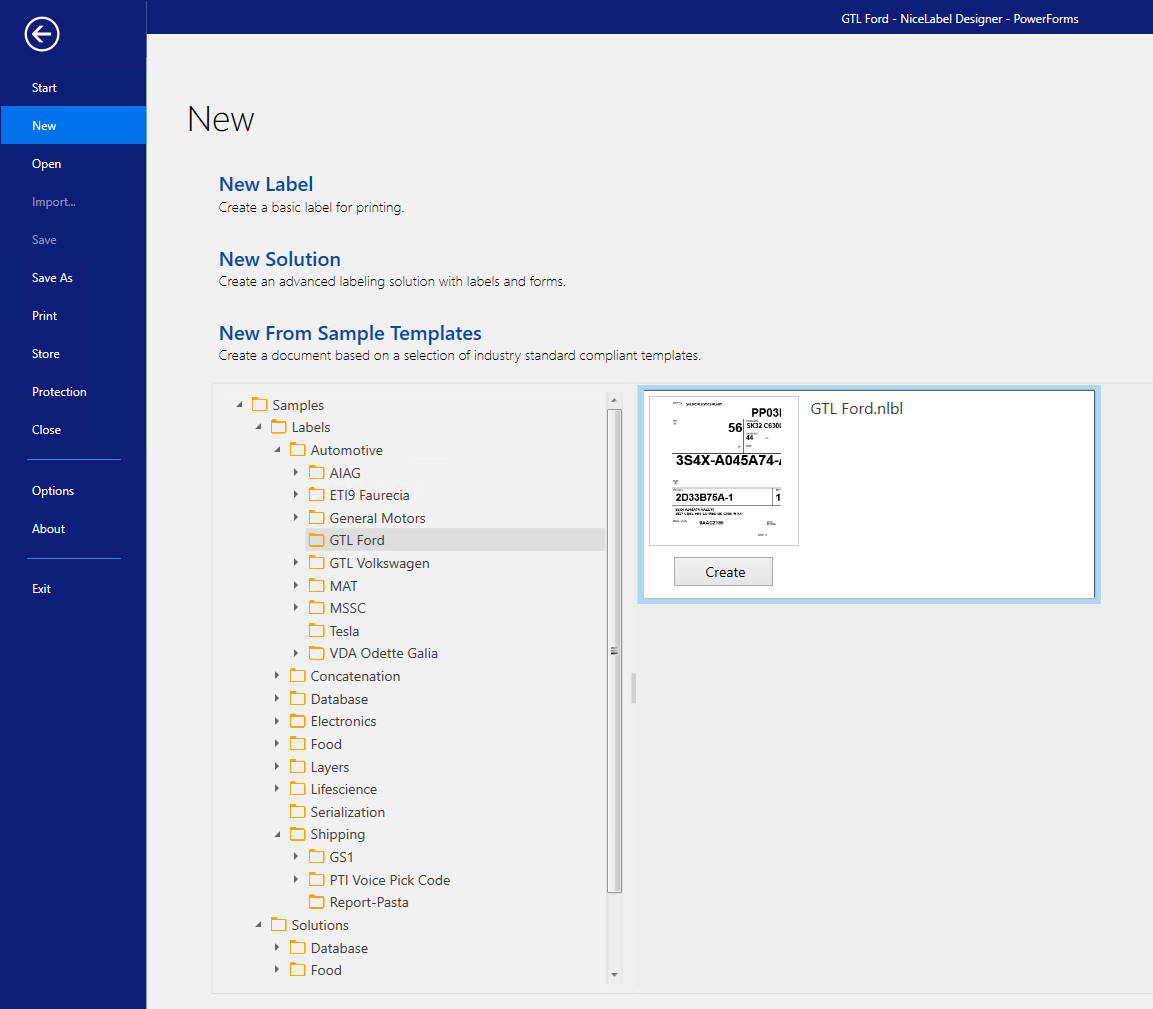
There should be some example files. In Designer, click on “Create New from Samples Templates”. Expand Samples -> Labels -> pick any label that might be applicable.
Simplify it a bit, delete anything unneeded. Save it to your label folder on the Visual server.
Go back to Label Printer Setup Utility.
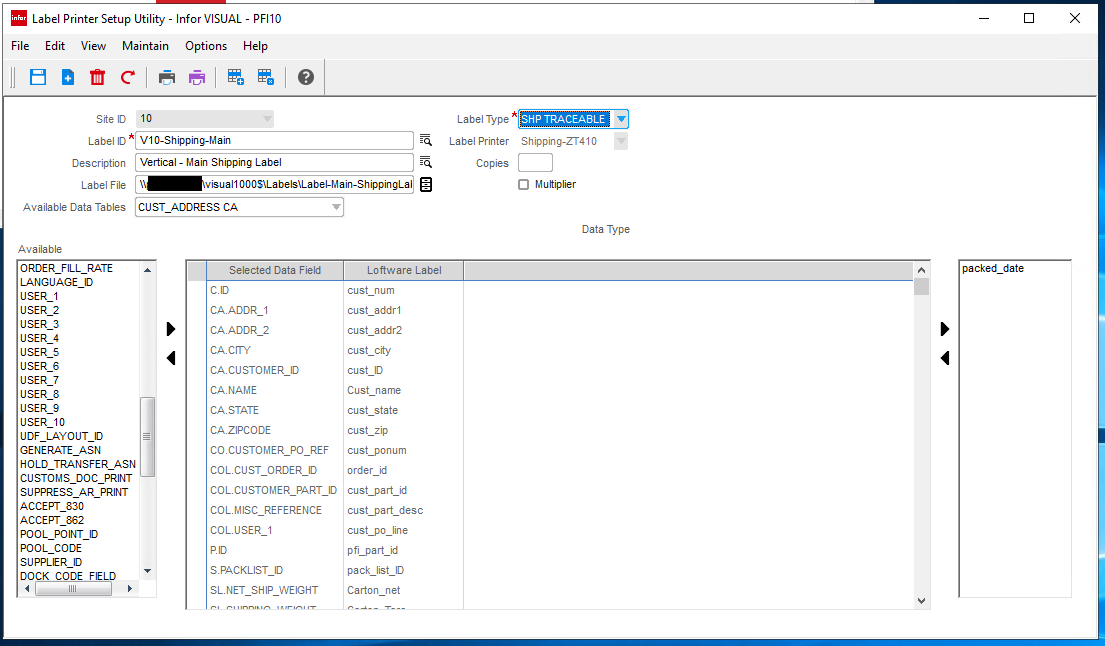
First decide your label type. Most should be pretty intuitive. For shipping labels, stick to SHP TRACEABLE. It has everything SHIPPING does but also lot trace info. Visual does a pretty decent but not perfect job of including all of the data tables you’re likely to need. But not a perfect one. You can’t add additional tables or fields according to Infor Support. So if one field is needed outside of the list, you’ll need to print entirely from Nicelabel directly. That will be covered in Part 3.
Once you selected the type of label, enter a label ID and a description. Then use the button on the right side of the textbox next to Label File to select the label file from the label folder.
You’ll now see a list of fields on the right hand side. These are the fields in the Label file. You’ll have to match them to Visual DB fields on the left hand side. You have to go one field from both sides at a time, it is pretty tedious.
Save once complete.
Step 7 - Label Groups
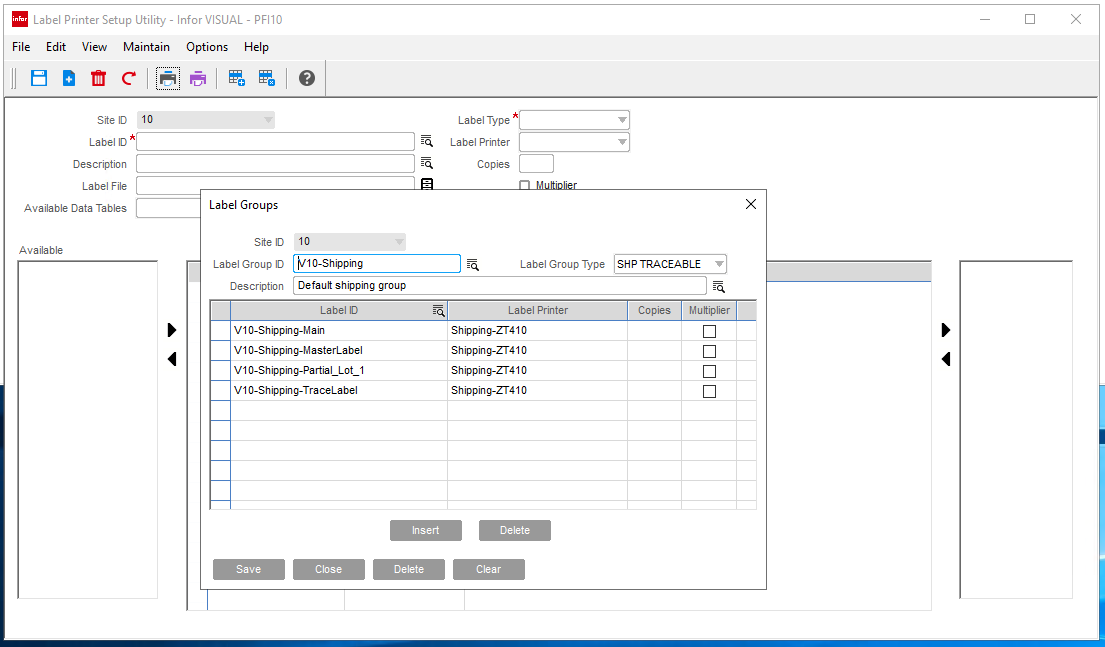
Once you have enough labels or samples created, to go Visual -> Admin -> Label Printer Setup Utility -> Maintain -> Label Groups
Type your group name for the group of labels. Give it a description and set the Label Group Type. To add individual labels, use the insert button and double click on the icon to the right of the Label ID button. You can select more than one label at a time using shift or control buttons. Remember to save
Step 8 - Error handling
If your labels stop printing or don’t stop printing when they should, go to the Nicelabel Control Panel web page (EPM).
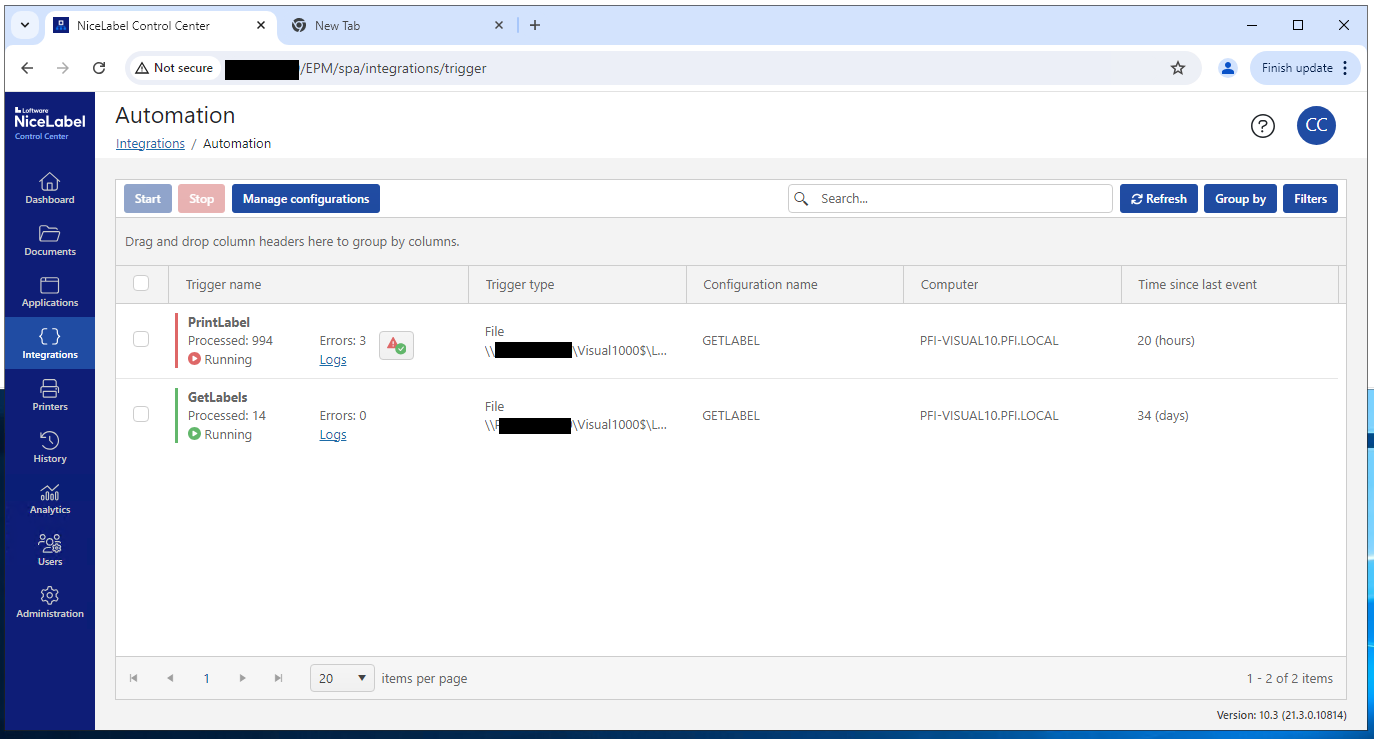
Click on Integrations, it should already have your MISX you set up earlier. Otherwise add it.
If your printer is shooting out labels without end, turn the printer off. Go to Integrations in the EPM, check the box next to PrintLabel and hit the red stop button. Clear the Windows printer spool for the printer. Go to the label folder, and manually delete any PAS files in it. Then turn on printer. It shouldn’t shoot out any more labels. Then check box next to PrintLabel in EPM and click blue Start button.
If your label printer isn’t printing when it should be printing, and see if your PrintLabel integration is red and has errors listed. Click on Logs. Look for entries in red. On the front page of the EPM (Dashboard), there is also a “Recent Errors” box. The descriptions tend to be pretty good. It will tell you the label, the printer, the workstation, the user and the field causing problem.
Attribution
If you wish to use this guide internally, just maintain attribution/copyright with a link to this article. Original URL: https://casper.im/Visual-Nicelabel/

